Introduction
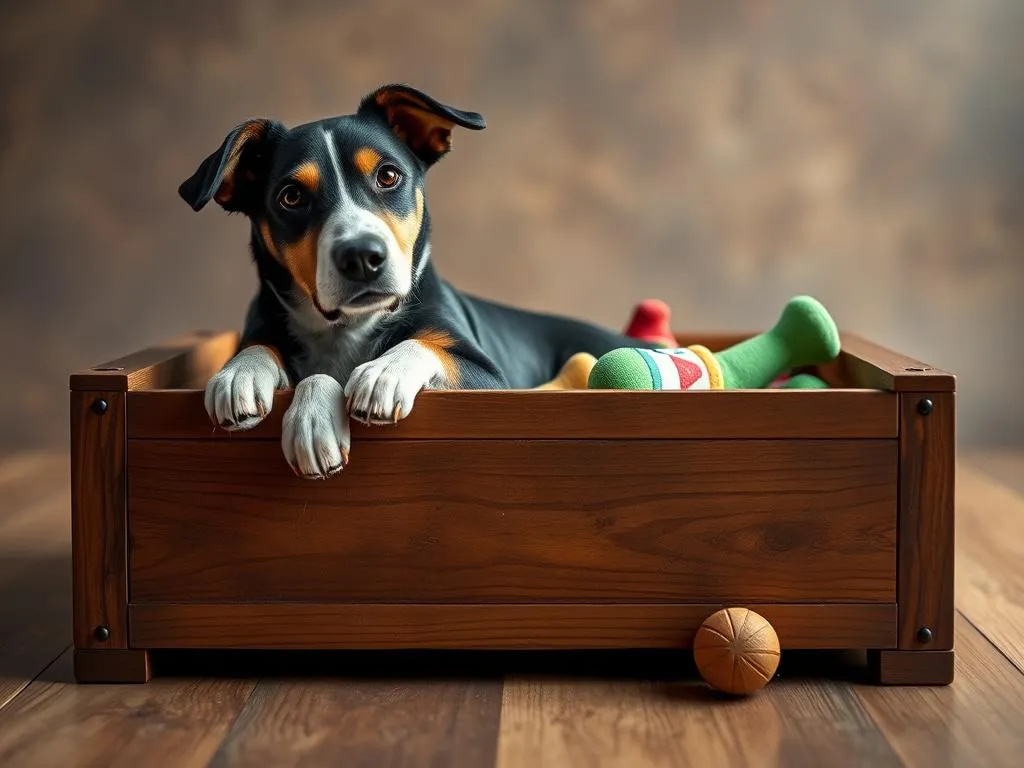
When it comes to pet care, organization is key. A tidy environment not only enhances your living space but also contributes positively to your pet’s well-being. Enter the DIY dog toy box—a custom solution that not only helps manage your dog’s playthings but also adds a personal touch to your home. By creating a dedicated space for your dog’s toys, you can keep clutter at bay, improve your furry friend’s play experience, and instill a sense of responsibility in yourself as a pet owner. This article will guide you through the entire process—from understanding the need for a toy box to the creative aspects of building and maintaining it.
Why a Dog Toy Box is Essential
Keeping Your Living Space Organized
Having a dog toy box is an effective way to reduce clutter in your home. Without a designated space for toys, your floor can easily become a chaotic jumble of squeaky balls, ropes, and plush animals. By creating a specific area for your dog’s toys, you not only tidy up but also make it easier to locate items when playtime rolls around.
Enhancing Your Pet’s Play Experience
A well-organized toy box makes it simple for your dog to access their favorite toys. This easy access encourages play and physical activity, essential components of a dog’s happiness and health. With a DIY dog toy box, your pup can join in on the fun without waiting for you to dig through piles of toys.
Teaching Responsibility to Pet Owners
Creating a dog toy box instills habits of tidiness and responsibility. You’ll develop a routine of regularly maintaining and organizing the toys, ensuring that your dog’s playthings remain in good condition. This reinforcement of organization can extend to other areas of your life as well.
Materials Needed for a DIY Dog Toy Box
Essential Materials
To build your own dog toy box, you will need a few essential materials:
- Wood: Choose durable types like pine, oak, or plywood. Consider sizes based on your available space and the amount of toys your dog has.
- Tools: Basic tools such as a saw, drill, and sandpaper will be necessary for cutting and assembling the box.
- Paint or Stain: Optional, but a nice finish can personalize your box and protect the wood.
Optional Decorations
Once you have the basic structure, you can get creative with optional decorations:
- Stencils and Decals: Personalize your box with your dog’s name or fun designs.
- Fabric for Lining: Add a soft lining for comfort.
- Handles or Wheels: Consider these features for ease of mobility.
Safety Considerations
Safety is paramount when crafting your dog toy box. Always choose non-toxic materials, and ensure that all edges are smooth to prevent injuries. This attention to detail will keep your pet safe while enjoying their new storage space.
Step-by-Step Guide to Building Your Dog Toy Box
Planning Your Design
Before diving into construction, plan your design carefully. Measure the space where you’ll place the box and determine its size based on your dog’s toy collection. Think about features you might want, such as a lid to keep toys secured or compartments for different types of toys.
Cutting and Assembling the Materials
-
Cut the Wood to Size: Using your saw, cut the wood according to your planned dimensions. Ensure all cuts are straight for a neat finish.
-
Assemble the Pieces: Start by attaching the sides to the base, using screws or wood glue. Ensure the corners are right angles for stability. Once the sides are secure, attach the front and back panels.
Sanding and Finishing Your Toy Box
After assembly, it’s crucial to sand the edges and surfaces thoroughly. This step is important not only for aesthetics but also for safety. After sanding, you can apply paint or stain to protect the wood and enhance its appearance. Allow it to dry completely before moving on.
Final Assembly and Adding Decorative Elements
Once the paint or stain is dry, complete your dog toy box by adding any handles or wheels. Personalize it with decorations, such as stencils or fabric lining, to make it truly unique.
Creative Ideas for Customizing Your Dog Toy Box
Themed Designs Based on Dog Breeds
Consider designing your dog toy box around your dog’s breed. For example, if you have a Golden Retriever, you might choose colors and motifs that reflect their golden fur and playful spirit.
Using Upcycled Materials
Get creative with upcycled materials! Repurpose old furniture, like a wooden crate or dresser drawer, to transform it into a stylish toy box. This not only saves money but also adds a unique touch to your home.
Fun Labeling Options
Labels can help keep things organized. You could use chalkboard paint on the front of the box for a customizable label. Alternatively, create custom labels with pictures of the toys, making it easy for children and guests to help keep the box organized.
Tips for Maintaining Your Dog Toy Box
Regular Cleaning and Organization
To keep your dog toy box in top shape, establish a regular cleaning schedule. Aim to clean and organize the box at least once a month. During this time, check the condition of the toys and discard any that are worn or damaged.
Rotating Toys for Increased Engagement
To keep your dog interested in their toys, consider rotating them regularly. Leave out a selection of toys for your pup to enjoy while storing seasonal or less-used toys in the box. This practice can help maintain your dog’s excitement during playtime.
Signs It’s Time to Replace Toys
Be vigilant about the condition of your dog’s toys. Look for signs of wear and tear, such as fraying fabric or exposed stuffing. If a toy is damaged, it’s time to replace it to ensure your pet’s safety.
Conclusion
Creating a DIY dog toy box is a rewarding project that offers numerous benefits. Not only does it help keep your living space organized, but it also enhances your pet’s play experience and teaches responsibility. Take the opportunity to personalize your toy box, making it a reflection of your dog’s personality while also serving a practical purpose. Let your creativity shine as you embark on this fun DIY adventure!
FAQs
What are the best materials for a dog toy box?
The best materials are sturdy woods like pine or oak, as they can withstand wear and tear from regular use. Ensure that any finishes applied are non-toxic and safe for pets.
How do I ensure my dog’s safety with the toy box?
To ensure safety, use non-toxic materials, sand all edges smoothly, and regularly check the condition of the box and toys for any signs of damage.
Can I create a dog toy box on a budget?
Absolutely! You can use upcycled materials or repurpose furniture you already have at home, making it a cost-effective project.
How often should I clean and reorganize the toy box?
A monthly cleaning and organization schedule is ideal for keeping the box tidy and ensuring all toys are in good condition.
Creating a DIY dog toy box is more than just a fun project—it’s a practical solution that benefits both you and your furry friend. Get started today and enjoy a more organized, playful home!


