Creating a DIY raised dog bed can be a rewarding project that enhances your furry friend’s comfort and health. Raised dog beds have gained popularity among pet owners for their numerous benefits, including improved joint support, easier cleaning, and better air circulation. By crafting a bed tailored to your dog’s size and preferences, you can ensure they have a cozy spot to relax.
Benefits of a Raised Dog Bed
Improved Comfort
Raised dog beds provide a unique advantage when it comes to comfort. By elevating your pet off the ground, these beds offer better insulation from cold surfaces and cushioning that can alleviate pressure points. For older dogs or those suffering from arthritis, a raised bed can reduce joint pain, providing a more restful sleep.
Health Benefits
In addition to comfort, raised dog beds have several health benefits. During hot summer months, they allow for better airflow, helping to keep your pet cool. Conversely, in colder weather, the elevation helps keep dogs warmer by insulating them from chilly floors. Furthermore, raised beds can deter dirt, insects, and pests, which can be especially beneficial for outdoor dogs.
Easy Maintenance and Cleaning
Cleaning a raised dog bed is significantly easier than traditional beds. With the bed elevated, you can quickly sweep or vacuum underneath, preventing dirt and hair buildup. Moreover, materials used in raised beds tend to be more durable and resistant to wear, ensuring a long lifespan.
Essential Materials and Tools
Recommended Materials
Choosing the right materials is crucial for constructing a DIY raised dog bed that lasts. Here are some options:
- Wood Types:
- Cedar: Naturally resistant to insects and rot, making it a great choice for outdoor beds.
-
Plywood: Affordable and easily available, but ensure it’s sanded well to avoid splinters.
-
Alternative Materials:
- Plastic: Lightweight and easy to clean; ideal for outdoor use.
- Metal: Provides a modern look and is highly durable.
Tools Needed
Gathering the right tools will streamline your building process. Here’s a list of basic and optional tools:
- Basic Tools:
- Saw (hand saw or jigsaw)
- Drill
- Screws
- Sandpaper
-
Measuring tape
-
Optional Tools:
- Circular saw for precise cuts
- Power sander for smoother finishes
Designing Your Raised Dog Bed
Choosing the Right Size
When designing your DIY raised dog bed, size matters. Measure your dog from nose to tail and add a few inches for comfort. Here’s a quick guide:
- Small Dogs: 24” x 18”
- Medium Dogs: 36” x 24”
- Large Dogs: 48” x 30”
Ensure the bed is spacious enough for your pet to stretch out comfortably.
Design Options
There are various designs to consider for your raised dog bed, depending on your skill level and aesthetic preferences:
- Simple Frame: A straightforward rectangular frame that supports a mattress.
- Slatted Base: Allows for airflow and easy drainage if placed outside.
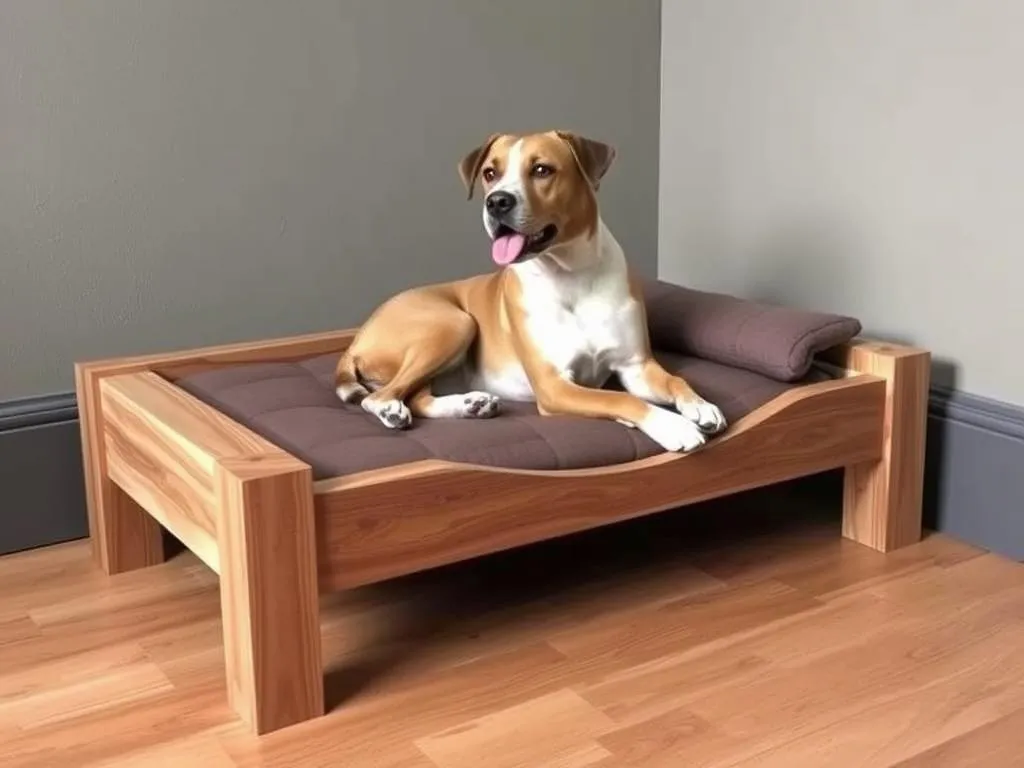
- Cushioned Top: For added comfort, consider adding a soft cushion or mattress to the top.
For aesthetics, think about colors, stains, or even custom designs that reflect your home decor.
Step-by-Step DIY Raised Dog Bed Plans
Basic Design Plan
For beginners, a simple raised dog bed is an excellent starting point. Here’s a plan:
Materials List:
– 2 pieces of 2” x 4” wood (48” long)
– 2 pieces of 2” x 4” wood (30” long)
– 1 piece of plywood (48” x 30”)
– Screws
– Sandpaper
Instructions:
1. Cut the Wood: Cut your 2” x 4” pieces to the specified lengths.
2. Assemble the Frame: Using screws, attach the 48” pieces to the 30” pieces to form a rectangle.
3. Attach the Base: Secure the plywood to the top of the frame.
4. Sand the Edges: Smooth out any rough edges to prevent splinters.
5. Finish: Optionally, paint or stain the wood for aesthetic appeal.
Intermediate Design Plan
For those ready to take on a bit more complexity, consider adding features like storage:
Materials List:
– 2 pieces of 2” x 4” wood (48” long)
– 2 pieces of 2” x 4” wood (30” long)
– 1 piece of plywood (48” x 30”)
– 2 small storage bins
– Screws
– Sandpaper
Instructions:
1. Build the Frame: Follow the basic design instructions.
2. Create Storage: Cut additional pieces of wood to create a shelf beneath the bed for storage bins.
3. Attach the Base: Secure the plywood on top.
4. Sand and Finish: Smooth edges and apply a finish.
Advanced Design Plan
For experienced builders, a high-end design might include features like integrated toys or a multi-level layout:
Materials List:
– 4 pieces of 2” x 4” wood (48” long)
– 4 pieces of 2” x 4” wood (30” long)
– 1 piece of plywood (custom sizes for top and shelves)
– Optional cushions
– Screws
– Sandpaper
Instructions:
1. Construct the Base: Follow the earlier instructions, creating a more substantial frame for durability.
2. Add Levels: Use additional plywood pieces to create levels for toys or additional space.
3. Secure Everything: Ensure all parts are tightly fastened.
4. Finish with Style: Use advanced finishing techniques for a polished look.
Customization Ideas
Personalizing the Bed
Make your DIY raised dog bed unique by adding personal touches. Here are some ideas:
- Dog’s Name: Use stencils or wood burning to personalize the bed.
- Color Choices: Choose colors that match your home décor or your dog’s personality.
- Fabric Choices: Consider using fabrics that are durable and easy to clean for cushions.
Seasonal Adaptations
You can modify the bed for different weather conditions:
- Summer: Use breathable materials to keep your dog cool.
- Winter: Add a waterproof cover and an insulated cushion for warmth.
Safety Considerations
Material Safety
When building your DIY raised dog bed, ensure that all materials are pet-safe. Avoid toxic finishes and choose woods that are safe for pets. Always sand down edges to avoid splinters.
Stability and Durability
Stability is crucial. Ensure your bed can support your dog’s weight without wobbling. If used outdoors, consider anchoring the bed to prevent tipping.
Conclusion
A DIY raised dog bed not only provides your pet with comfort but also offers numerous health benefits. By following the plans and tips outlined, you can create a personalized bed that suits your dog’s needs. Don’t hesitate to get creative with designs and colors, making it a true reflection of your pet’s personality.
FAQs
Common Questions About Raised Dog Beds
Many dog owners wonder if their pets prefer soft beds. While some dogs enjoy plush cushions, others appreciate the firmness of a raised bed. It often depends on your dog’s individual preferences and health needs.
Troubleshooting Tips
If you encounter issues such as wobbling or squeaking, check that all screws are tight and the structure is stable. For repairs, wood glue is an excellent quick fix for minor issues.
By embracing the DIY raised dog bed movement, you can enhance your dog’s quality of life while enjoying the satisfaction of a job well done.