
Caring for your dog’s health goes beyond regular veterinary visits and a balanced diet; it includes grooming practices that ensure your furry friend remains comfortable and happy. One essential aspect of grooming is nail care. Regularly tending to your dog’s nails not only keeps them looking sharp but also prevents common health issues associated with overgrown nails, such as discomfort, mobility challenges, and even injury.
Painting your dog’s nails can be a fun and creative way to enhance their appearance while promoting their health. If you’re new to this grooming task, don’t worry! In this comprehensive guide, we’ll walk you through everything you need to know about safely and effectively painting your dog’s nails.
Understanding Dog Nail Care
Anatomy of a Dog’s Nail
To understand how to care for your dog’s nails, it’s essential to know their anatomy. Each nail consists of three primary parts: the quick, the nail bed, and the nail tip. The quick is the sensitive, pink tissue inside the nail which contains blood vessels and nerves. Trimming the nail too short can cut into the quick, causing pain and bleeding. Knowing the anatomy of your dog’s nails helps ensure you avoid this painful accident.
Signs Your Dog Needs Nail Care
Not sure if your dog’s nails need attention? Look for these indicators:
- Overgrown nails: If your dog’s nails touch the ground when they walk, it’s time for a trim.
- Behavioral signs: Watch for limping, reluctance to walk, or frequent licking of the paws. These can signal discomfort due to long nails.
Tools You Will Need
Before you begin, gather the necessary tools to make the process smoother and safer:
- Nail clippers: Use a pair designed specifically for dogs. Options include guillotine-style clippers, scissors-type clippers, and electric grinders. Brands like Safari and Barkley are popular choices.
- Nail files or grinders: These help smooth rough edges and can be used after clipping.
- Dog-safe nail polish: Ensure that the polish is non-toxic and specifically formulated for dogs.
- Styptic powder: Optional, but useful for stopping bleeding if you accidentally cut the quick.
Preparing for Nail Painting
Choosing the Right Environment
Pick a calm, quiet area where your dog feels safe. This could be in your living room or a cozy corner of your home. A distraction-free environment helps your dog relax and makes the process easier for both of you.
Gathering Your Supplies
Gather all your tools before starting. Having everything at hand prevents unnecessary interruptions. Always opt for non-toxic products to ensure your dog’s safety.
Getting Your Dog Comfortable
Before diving into nail care, take some time to acclimate your dog to the process. Here are some tips:
- Introduce the tools slowly: Let your dog sniff and explore the clippers and polish.
- Use treats and praise: Positive reinforcement encourages your dog to associate the nail painting process with good experiences.
Step-by-Step Guide to Painting Your Dog’s Nails
Trimming the Nails
Before painting, your dog’s nails should be trimmed. Here’s how to do it safely:
- Hold the paw gently: Make sure your dog is comfortable. You can sit beside them or have them lying down.
- Locate the quick: Identify where the quick ends in each nail. For dogs with light-colored nails, the quick is often visible. For dark nails, trim a little at a time to avoid cutting the quick.
- Trim carefully: Use your clippers to cut the nail just above the quick. If your dog seems distressed, take a break and try again later.
If you accidentally cut the quick, apply styptic powder to stop the bleeding and soothe your dog.
Preparing the Nails for Painting
Once trimmed, it’s time to prepare the nails for painting:
- Clean the nails: Remove any dirt and debris using a damp cloth or dog-safe wipes. This ensures the polish adheres properly.
- Buff the nails: Lightly buff the surface of each nail with a file. This roughens the surface slightly, helping the polish stick better.
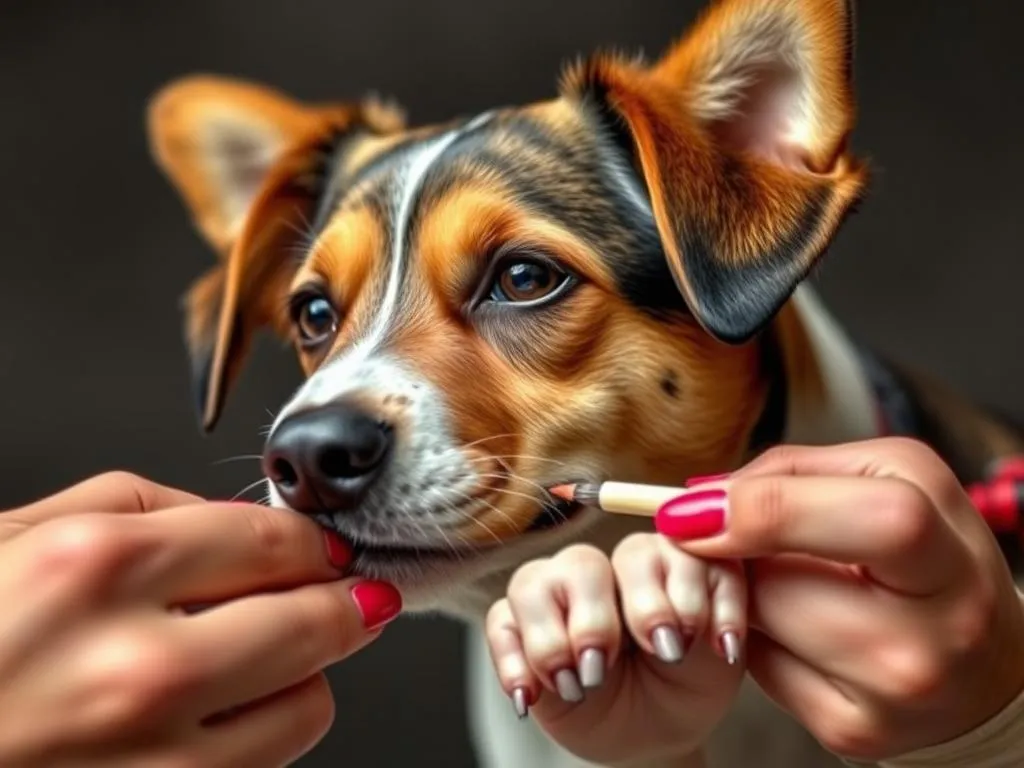
Applying Dog-Safe Nail Polish
With the nails prepped, you can start painting! Follow these steps:
- Choose a color: Select a shade that suits your dog’s personality.
- Base coat (optional): If your polish requires it, apply a thin base coat to protect the nails and help the color apply evenly.
- Painting the nails:
- Hold the paw comfortably and gently press the nail against your palm for stability.
- Use the brush to apply the polish in thin layers, starting from the base and working towards the tip.
- Ensure you don’t get polish on the skin.
- Top coat (optional): Apply a top coat to enhance shine and durability if desired.
Drying and Finishing Touches
After applying the polish, allow your dog’s nails to dry completely.
- Recommended drying times: Generally, allow at least 15-20 minutes for the polish to dry fully.
- Prevent licking: Use a dog cone or distract your dog to keep them from licking their nails during drying time.
- Final checks: Once dry, check for even coverage and do any touch-ups as needed.
Post-Painting Care
Monitoring for Reactions
After painting, keep an eye on your dog for any signs of discomfort or allergic reactions. Symptoms may include excessive licking, swelling, or redness. If you notice these signs, remove the polish and consult your veterinarian.
Maintaining Nail Health
To maintain nail health between painting sessions:
- Regular trims: Aim to trim your dog’s nails every 3-4 weeks, depending on their growth rate.
- Frequency of nail painting: Depending on your dog’s activity level and nail growth, nail painting can be done every few weeks as part of their grooming routine.
Grooming as a Regular Routine
Incorporate nail care into your dog’s regular grooming schedule. This helps your dog get used to the process and makes it easier over time. Don’t forget to include other grooming activities such as brushing, bathing, and ear cleaning for a well-rounded approach to dog health.
Common Mistakes to Avoid
Rushing the Process
Patience is key! Rushing through nail painting can lead to mistakes, injuries, or a negative experience for your dog. Take your time, especially if your dog is anxious or fidgety.
Using Human Nail Products
Never use human nail products on your dog. These products can contain harmful chemicals, such as acetone, that can be toxic to pets. Always opt for dog-safe nail polish.
Ignoring Your Dog’s Signals
Your dog will communicate their comfort level through body language. If they seem stressed or uncomfortable, stop and try again later. It’s essential to respect your dog’s signals to build trust and make the process enjoyable.
Conclusion
Regular nail care is an integral part of your dog’s overall health and well-being. By learning how to paint your dog’s nails safely and effectively, you can prevent health issues, enhance their appearance, and enjoy a fun bonding experience. Remember, patience and positivity are crucial for both you and your dog.
With the right tools and techniques, nail painting can become a regular and enjoyable part of your grooming routine. Happy grooming!
Related posts:
 My Dog Ate A Crayon Vet Answer
 Dogs Tongue Facts
 Weaning Puppies Off Their Mother
 Are Frogs Poisonous To Dogs
 Should You Separate Your Puppy And Older Dog
 Why Is My Dog Hiding
 Help Puppy Sleep Through Night
 Puppys First Vet Visit Checklist
 Can Dogs Eat Chocolate
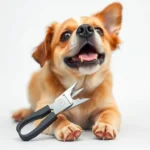 Best Dog Nail Clippers For Thick Nails